Using SoloLink with Wifibooth to connect your iPhone camera to your iPad
Please note: The BluePrint app was renamed to SoloLink in August of 2019
SoloLink is a free app designed to work with Wifibooth. You can get it here: http://itunes.apple.com/app/id1127641254
Prefer to watch a video instead of reading? Use the Related Video link above. Note that the video refers to the older BluePrint app, which was renamed SoloLink.
Overview
To use SoloLink you need two iOS devices: one with Wifibooth or SoloLink (2a or 2b), and one with SoloLink (1). The most common configuration is Wifibooth on an iPad (2a) and SoloLink on an iPhone (1).

With SoloLink you either share the camera to the other device (1), or, you share a printer and internet access (2).
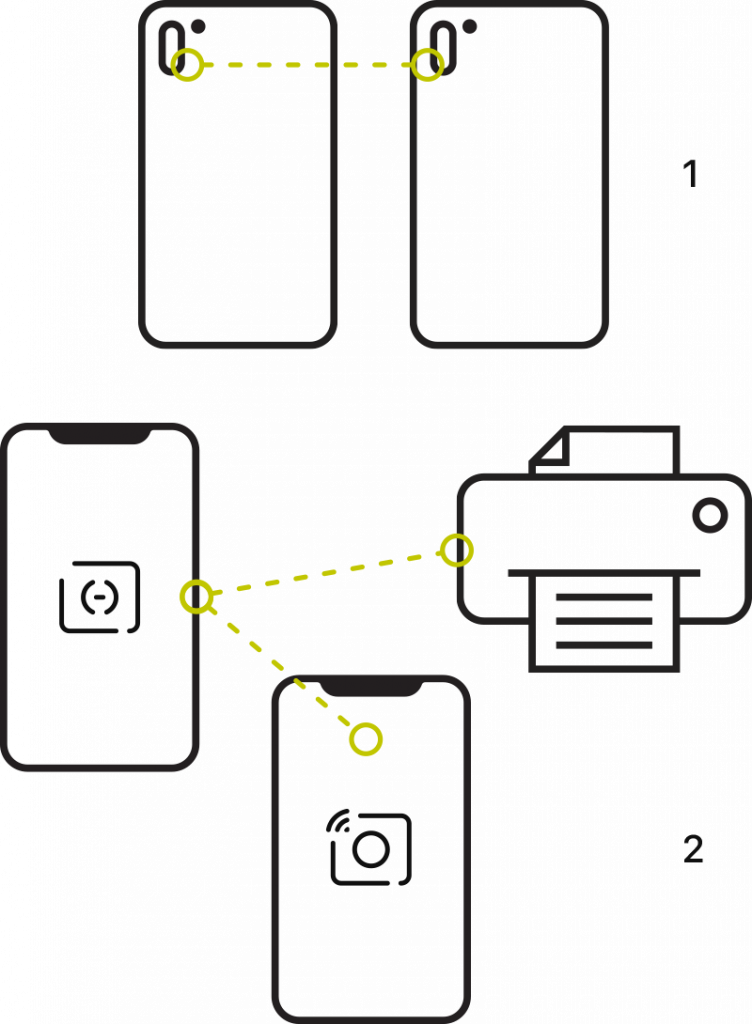
Which?
If you want to connect Wifibooth to a remote iPhone’s camera with SoloLink (1), keep reading.
If you want to use SoloLink to share a printer or internet access to Wifibooth (2), please see this article instead.
Why?
SoloLink sharing an iPhone camera to Wifibooth on an iPad
A rear-facing iPhone camera is much higher quality than any iPad camera. For this reason alone, using the iPhone camera remotely from the iPad makes sense. But if you have an iPhone with dual cameras (iPhone 8+ or newer), you can also use SoloLink to create effects like green screen (aka magic screen), where the background is replaced even without having a professional/green backdrop behind the guests.
Requirements
- iOS 12 or newer on both your iPad & iPhone
- SoloLink installed on your iPhone. It’s free, no sign-up required. App store link: http://itunes.apple.com/app/id1127641254
- Keep both apps, SoloLink and Wifibooth, updated to the newest versions available on the App Store
To connect your iPhone & iPad:
- First, either connect both devices to the same wifi network, or have the iPad connect to your iPhone’s personal hotspot (this will also mean the iPad has internet access, which is necessary for live emails / uploads). Your iPad & iPhone will also connect to each other if wifi is on and both devices are not connected to any network.
- On your iPad, in Wifibooth, open the camera popup (near the top-left of the app), and select “Remote iPhone”
- On your iPhone, open SoloLink and touch the button to share the camera
- Your iPad will find the iPhone and attempt to connect. Your iPhone will ask you for permission for the iPad to connect: grant it with “Always Allow”
That’s it!
On your iPhone, SoloLink offers you the following features:
- Green Screen effect (replaces the background with a different background). Note that this is only supported on dual-camera devices at least as new as the iPhone 8 Plus, ie. iPhone 8 Plus, iPhone X, iPhone XS, iPhone XS Max or newer. To activate this feature, hit the “Select…” button to choose a new background image. Note: the green-screen effect will only be applied when a person’s face is detected in the frame, and the lighting is good
- Video resolution: choose the resolution of the live-view feed being sent to your other device. This has no effect on the photos taken. If you experience issues with the live-view / video feed looking blocky or breaking up, then lower the resolution to 480.
- Flash: choose whether the iPhone flash will fire when a photo is taken
- Exposure controls: you can lock or unlock the exposure (so that the camera doesn’t change its brightness), and also apply an exposure compensation to make it brighter or darker
- Save photos to camera roll: by default, all photos taken will be saved to the camera roll on your iPhone. If you don’t want this, set it to “No”.
To conserve your iPhone’s battery, SoloLink will detect when it hasn’t taken a photo in a while, and reduce the frame-rate of the live-video it is sending. As soon as another photo is asked to be taken, or you interact with Wifibooth’s camera controls on the other end, the frame-rate will be reset to its normal rate.