12 easy ways to maximize your photo booth profitability in 2021
Photo booths are a fantastic way to earn more revenue at every event, increase your brand exposure, and make your guests happy. So what’s the best way of setting up a photo booth and your photo booth app?
After this article was published we released a new photo booth app! We think it’s great, and it’s free for smaller events. Check out Booth.Events for iPad & iPhone.
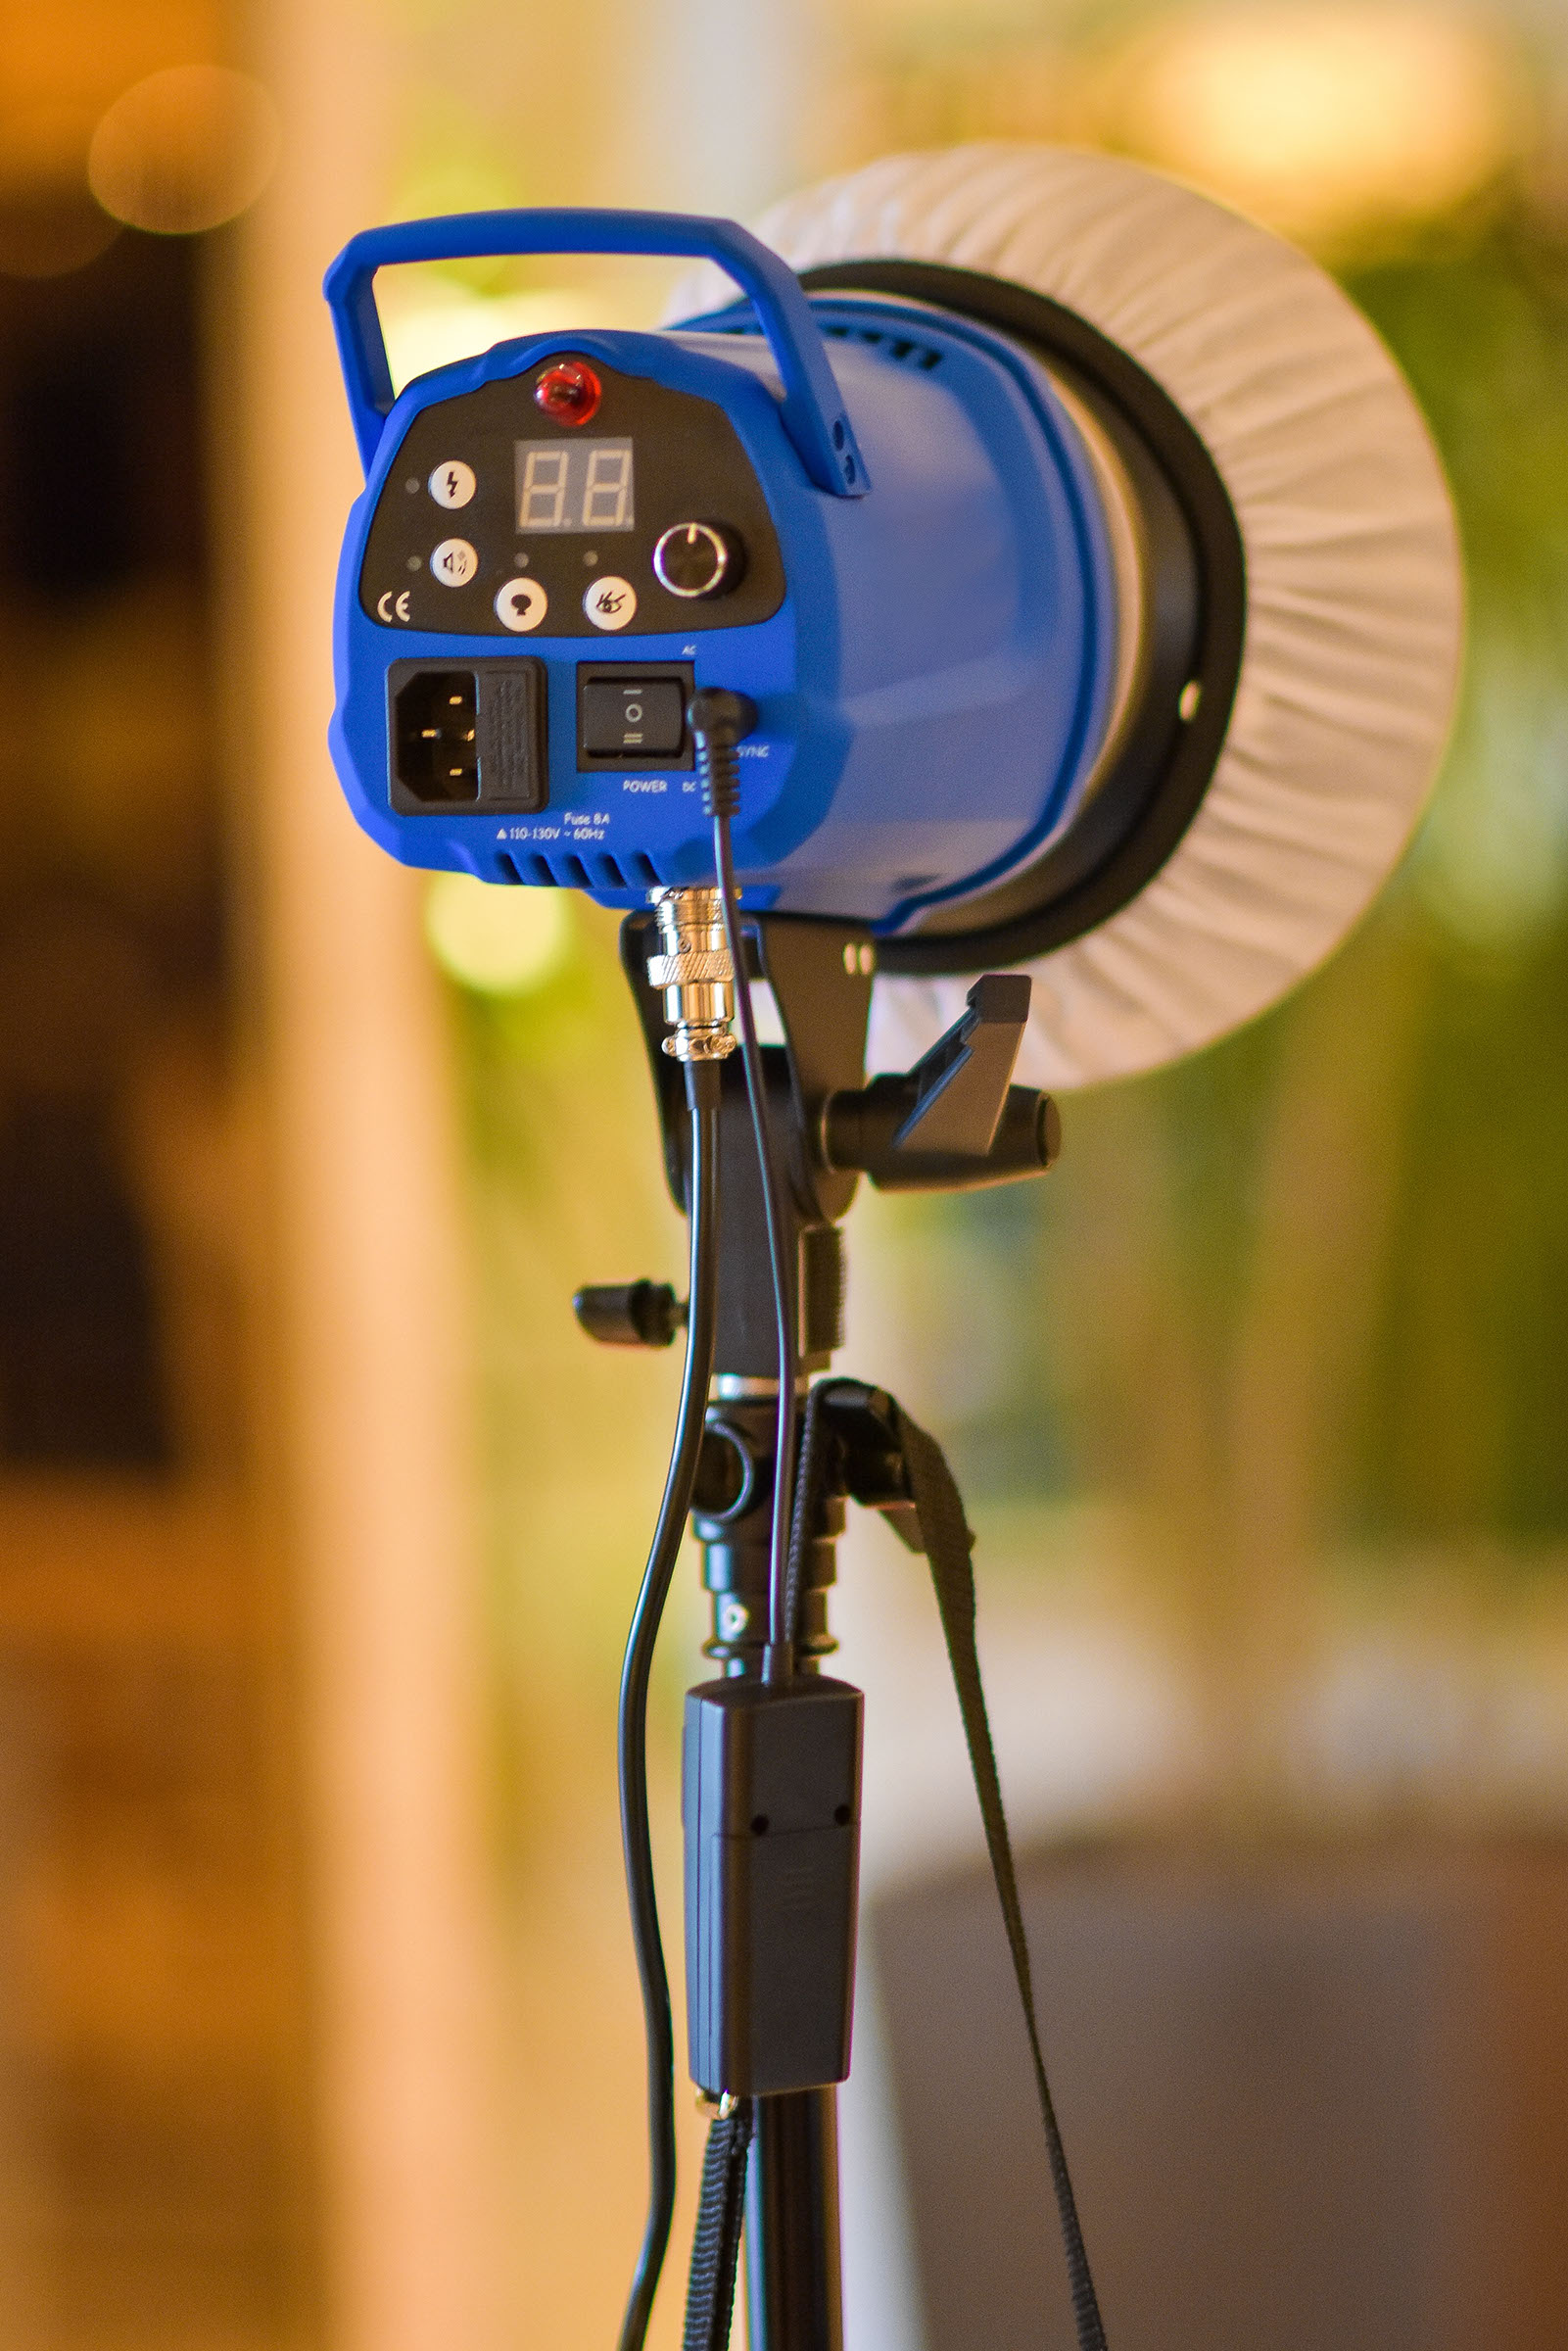
Lighting is Everything
It doesn’t matter if you have the best software and the best camera, you can still end up with terrible photos if your lighting isn’t great.
To start, decide if you will have:
- Constant lighting, like an LED light panel, or,
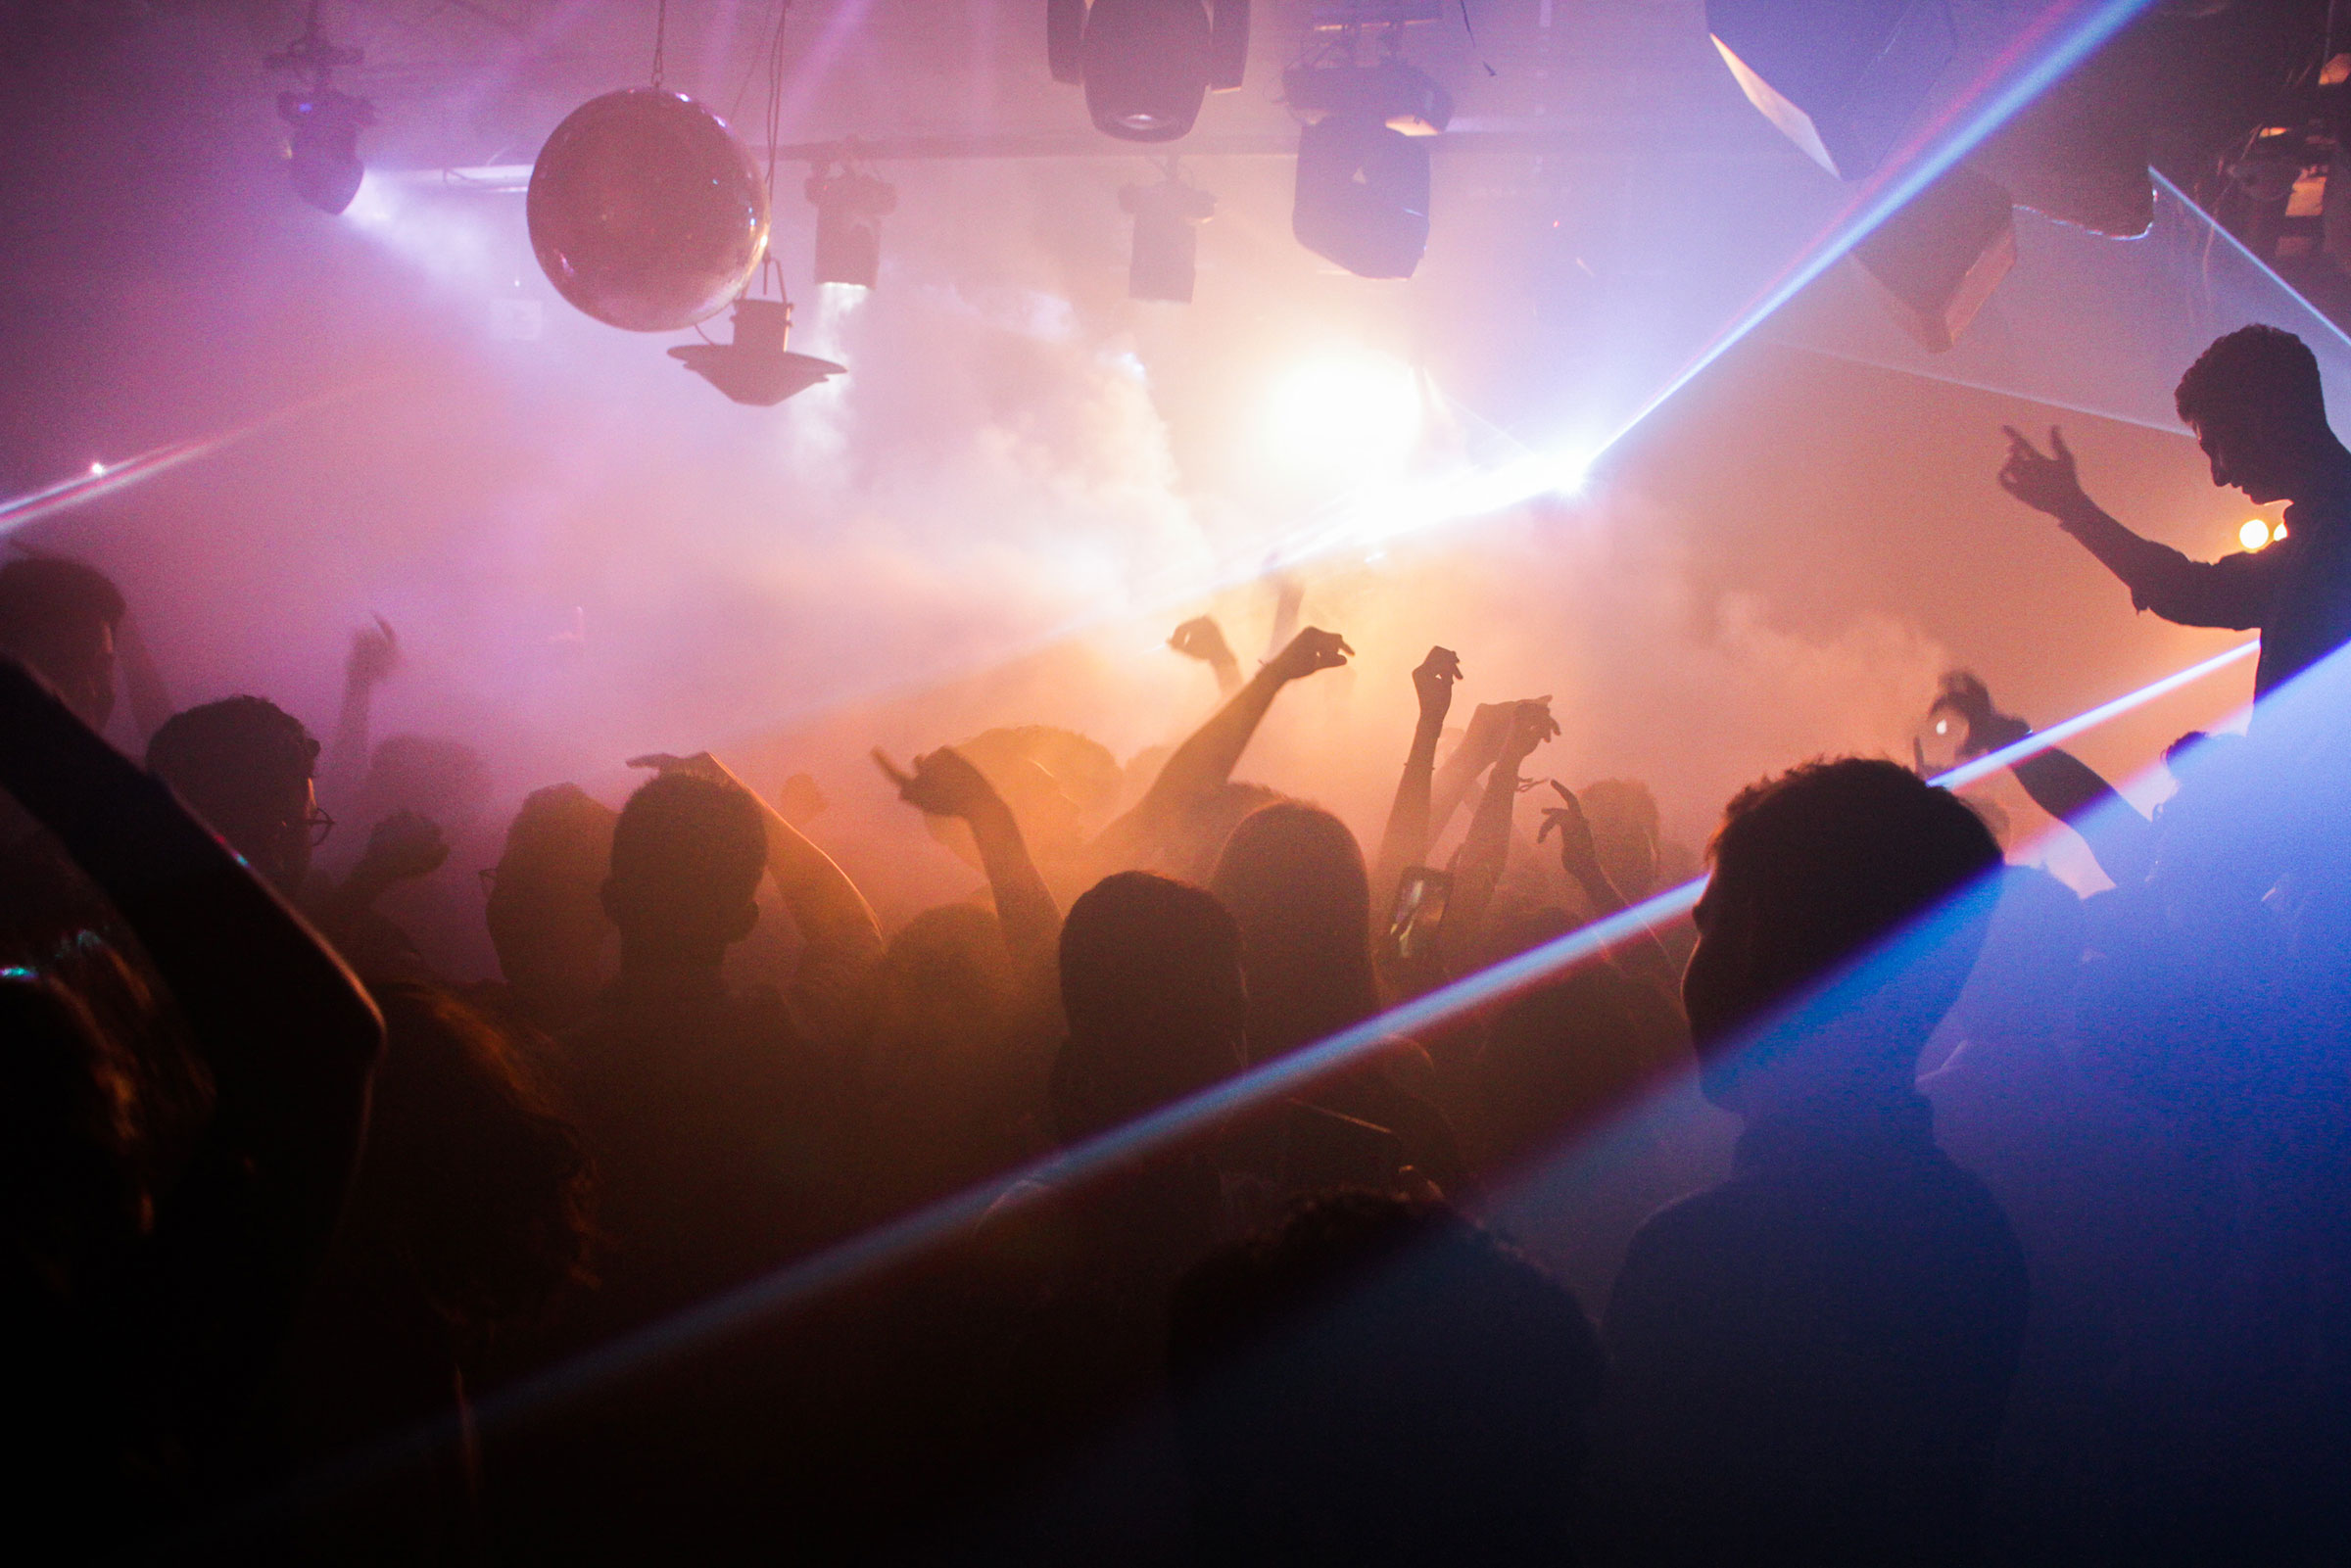
- Strobe / flash lighting, like a flash as shown in the photo above
If you bought a photo booth setup from a company like Photo Booth International, LA Photo Party, or Atlanta Photo Booth, then it likely came with the lighting included. Use what you have!
Constant lighting is the easiest because because the light is always on. This means you don’t have to synchronize the lights to the camera. You need to use constant lighting if you’re using the iPad camera to take the photos. You also need to use constant lighting when your connected camera is showing the live-view and is unable to expose the live-view differently than the photos. In general a Canon xxxD (like the 750D) has this issue but a Canon xxD (like the 80D) does not. This means that if you want live-view then the Canon 80D could use strobe/flash but the 750D cannot.
Strobe / flash lighting (as seen in the photo above) produces a more studio-like effect, with strong contrast and the ability to “freeze” motion. This is great for when your guests decide to jump or move quickly. To use strobe lighting you need to sync the flash with the camera that you’re using, just like you would do when you take photos with the flash. Your photo booth software needs to support connecting to your camera for this to be possible.
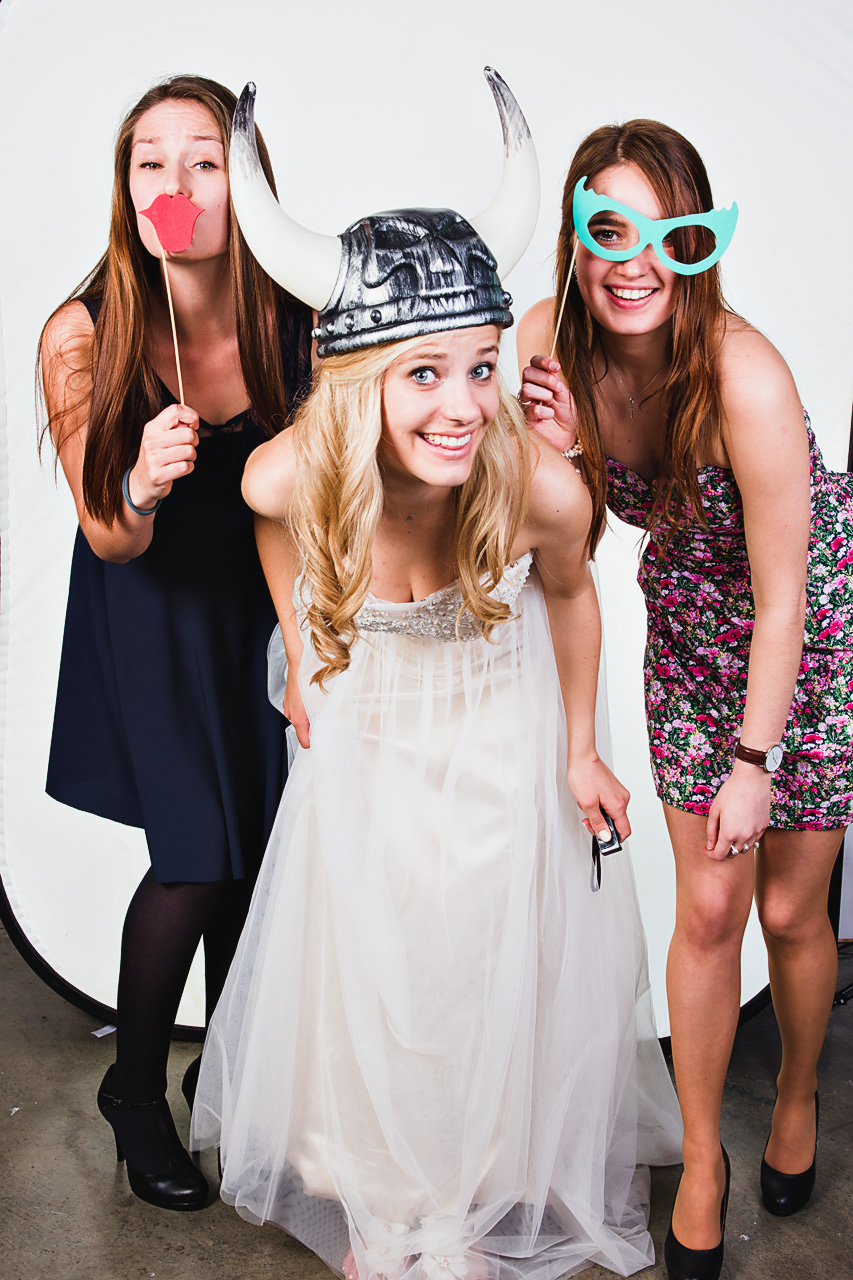
Where you position the light is important
If you’re using constant lighting then you probably need most or all of the light directly facing the guests. You should try placing a second light at 45 degrees to increase contrast. This means that the light is hitting the guests from the side. This will bring out the details because it will create minor shadows on the face. Play with it! A small change in the position of your lighting can have a big effect on the way your guests see the photos.
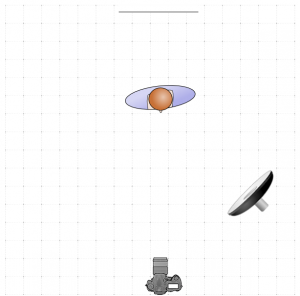
A setup with one light that’s 45 degrees from the camera
The same goes for strobe/flash lighting: consider having the main light about 30 to 45 degrees away from the camera, hitting the guests on an angle. In the photo above that’s what was used – about 40 degrees to the left (from the camera’s perspective).
Which iPad should you buy?
Yes, that super old iPad that your kids have beat up might still work, but it isn’t going to give the professional appearance you want for your business. The best reason to buy a newer iPad is that the quality of the front-facing cameras has improved greatly over time. Also, the introduction of the TrueDepth camera has allowed booth software to do awesome things with computational photography. For that reason we highly recommend the iPad Pro line with FaceID, because these are the only iPads that have the TrueDepth camera. At the time of writing the two size options are 11″ and 12.9″, and both are great!
Which App should you buy?
Obviously we’re biased, but we want you to be aware of all of the alternatives. Check out this article we wrote discussing all of the different aspects of the available photo booth apps and plans.
Camera orientation: landscape or portrait?
If you’re going to crop the photos to square then you don’t care – skip this section. Otherwise, you need to decide if the camera is going to be portrait orientation (up/down), or landscape (left/right). There’s no right answer, it depends on the event. If you’re going to have large groups taking photos, meaning each group is likely to have more than 5 people, then you should use landscape (left/right) to make sure everyone fits in the photo. Otherwise use portrait (up/down), so that you can get the full body of the guests in the photo. People care about their shoes, especially at weddings!
Green Screen
Green screen means that the photo booth software will change the background behind the guests. The older method of green screen is chromakey, which requires a green-colored backdrop behind the guests. The newer method uses computational photography to replace the background without any colored backdrop at all. It’s far easier to use because you don’t have to buy or carry around green-colored backdrops. The photo booth app for iPad Wifibooth supports this newer method with its SceneSelect feature. SceneSelect even allows guests to pick a photo for the background when they take their pictures.
Booth placement
Where should you put the booth? If you’re using strobe/flash lighting, then some guests might be annoyed if where they are sitting for most of the event is constantly bombarded by flashes. In this case consider moving the booth further away from where guests are seated. Otherwise, you don’t want the booth to be too far away: out of sight is out of mind. Your booth will only be successful if people actually find it and use it! Putting the photo booth in its own room (away from the guests) is a bad idea: it won’t get used. Try and put the booth somewhere where the guests already need to be, ie. on the way to the room/area where dessert is served.
Ideally you should have a space at least 2 meters (6 feet) wide and 3 meters (9 feet) deep for your photo booth. This gives guests the space to walk around the booth. You also need to think about kids running around and drunk guests rushing to the booth. More space means your guests are less likely to bump into your equipment and knock something over. If you have props on a table you need to make sure you have a space that’s big enough. Make sure the guests can easily grab the props between shots. A table just on the side of the booth is one way to do this.

Buy some props
Real booth props are an easy and cheap way to ratchet up your guests’ excitement in the booth! Digital props are cool, but a lot of guests will get a kick out of a good old moustache on a stick. You can buy these props in many places including cheap options from Amazon, Etsy, and Ebay. The trick is to order a few sets from different sellers, and find one that you think is good quality for the cost. You’ll be re-ordering them from time to time, because props don’t last forever: they get stolen and broken. It helps to have a reliable seller you can re-order from quickly!
Get a printer
In today’s digital world you might not think printing is necessary, but prints from your booth are your best way of being remembered. Prints are the most important brand exposure you’ll get from the event. These prints will get put on refrigerator doors, pinned on boards, stuck on walls, etc. That’s your logo and your brand in someone’s home, with a strong associated positive memory (ie. “that was a fun wedding!”). This directly translates to more callbacks and more revenue! It’s important to spend the money and get a great printer for your photo booth.
Make sure your photo booth software supports printing because not all of them do. The iPad photo booth app Wifibooth can print to any AirPrint printer or server, and also to DNP WPS products.
If your booth setup came with a printer then you are set. Otherwise, there are basically two options:
- Cheap & small printers, like the Canon Selphy series
- Dye-sublimation (aka dye sub) printers, like those made by DNP, HiTi,
and Mitsubishi
Get a dye sub printer
Unless your budget cannot stretch, getting a dye sub printer is definitely the option to choose. The primary reasons to get a dye sub printer are:
- Speed, because dye sub printers are much faster than regular printers
- Paper capacity, because you don’t have time to constantly be refilling empty paper trays
- Professional quality prints that don’t smudge or smear if guests have sweaty hands when they pick them up
An excellent printer to consider is the new DNP QW410, which is affordable, small, lighter than most dye sub printers, supports strip photo printing & cutting, and can optionally be battery powered. You’ll need to buy the optional wireless dongle so that your iPad can print to it.
You need to choose whether your booth prints single large photos (ie. 4×6″), or traditional “strip” photos (a series of 3 photos in a photo strip). If you’re opting for the strip photos then you need to make sure your printer supports cutting the paper for the strips. You don’t want to leave this as an exercise for your guests: scissors and alcohol are not a good combination.
For reviews on dye sublimation printers, check out this article on Lifewire or this article on prizedreviews.
Think about how your guests will get digital copies of their photos
There are a lot of ways for your guests to get their photos. You need to make sure that your business & brand are benefitting from the additional exposure. Obvious options include making sure your photo booth software is configured to send E-mail and SMS (texts). You’ll be collecting e-mail addresses which you can use to market to later on (assuming that you collected the required consent from your guests to contact them). You should also consider using cloud storage options such as Dropbox, because this will be great for the guests who want to see all of the photos (not just their own).
We suggest setting the photo booth app to upload your photos to Dropbox, and then configuring the emails sent from the app to include the link to the Dropbox album. That way guests can get the link to the entire album, which means they do not have to enter their email address more than once. It also lets them see the whole set of photos which is often more exciting than just seeing a single photo.
If you configure any social network sharing, then make sure your guests are informed and consent to their photos being posted. Remember, these photos are publicly accessible. If there’s going to be alcohol involved then consider turning off any integration that posts the photos publicly. You can always review them later and post them manually. This prevents embarrassing photos getting posted which could be a huge headache for you later.
If you’re looking for more information on how to setup the perfect photo booth, or if you want to compare different photo booth software to figure out which is the best for you, then please check out our other articles.
Did you know we have extensive videos and help articles to get you started with your photo booth as quickly as possible? We respond within hours on the Wifibooth Community, and we love hearing about what you’re building & dreaming about!